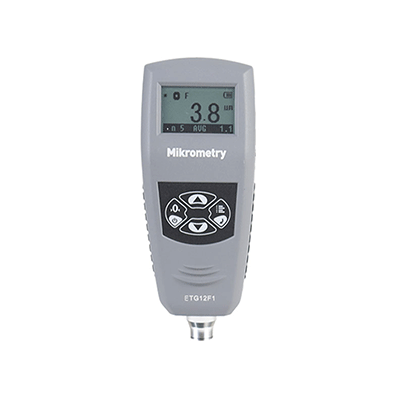
Detection Principle and Classification of Thickness Gauges
(2023年09月20日)https://www.mikrometry.com/detection-principle-and-classification-of-thickness-gauges.html
Up to now, the nondestructive testing technology of thickness gauges on the market has become an indispensable means for the processing industry to inspect the quality of finished products for users and ensure that the products meet high-quality standards. There are basically three types of thickness gauges as follows: three types of thickness gauges using magnetic measurement, eddy current measurement and ultrasonic measurement.
The principles and methods commonly used in classification of gauges generally include:
Magnetic measurement
It is suitable for measuring the thickness of non-permeable layer on permeability magnetic materials, which are: steel, iron, silver, and nickel. This measurement has high accuracy.
Eddy current measurement
It is suitable for measuring the thickness of nonconductive layer on conductive metals. This measurement has lower accuracy than that of magnetic measurement.
Ultrasonic measurement
It is suitable for accurate measurement of various plates and processed parts, and can also monitor the degree of thinning of various pipes and pressure vessels in production equipment after being corroded during use.
The classification of gauges can be divided into two types: the thickness gauge meter of magnetic attraction principle and the thickness gauge meter of magnetic induction principle. The thickness gauge meter of eddy current measurement principle has only one kind, which is eddy current thickness gauge meter.
The thickness gauge of magnetic attraction principle is to measure the thickness of the coating by using the suction force between the permanent magnet probe and the magnetically conductive steel to be proportional to the distance between the two. This distance is the thickness of the coating. So as long as the difference between the magnetic permeability of the coating and the substrate is large enough, it can be measured.
The magnetic thickness measurement induction principle uses the magnetic flux of the measuring head to flow into the iron substrate through the nonferromagnetic coating to measure the thickness of the coating. The thicker the coating is, the smaller the magnetic flux will be. When the probe with a coil on the soft iron core is placed on the test object, the instrument automatically outputs the test current. The magnitude of the magnetic flux affects the magnitude of the induced electromotive force. The instrument amplifies the signal and then indicates the thickness of the coating.
The eddy current thickness measurement uses high-frequency alternating current to generate an electromagnetic field in the coil as the measuring head. When the probe is close to a conductive metal body, an eddy current is formed in the metal material. This eddy current increases as the distance from the metal body decreases, and will affect the magnetic flux of the probe coil. This feedback effect is a measurement of the distance between the probe and the base metal.
The eddy current probe is used to measure the thickness of the coating on a non-ferromagnetic metal substrate, so we usually call the probe a nonmagnetic probe. Compared with the magnetic measurement principle, their electrical principle is basically the same. The main difference is that the probe is different, the frequency of the test current is different, and the signal size and scale relationship are different. In the thickness gauges of the past two years, through continuous improvement of the probe structure and microcomputer technology, by automatically identifying different probes, calling different control programs, outputting different test current and changing scale transformation software, two different types of probes are finally connected to the same thickness gauge meter. Based on the same idea, the thickness gauge which can be connected with up to 10 kinds of probes has also emerged. (You may also be interested in magnetic coating thickness gauge, and metal thickness meter)
The ultrasonic thickness gauge is based on the principle of ultrasonic pulse reflection to measure the thickness. When the ultrasonic pulse emitted by the probe reaches the material interface through the measured object, the pulse is reflected back to the probe, and the thickness of the measured material is determined by accurately measuring the ultrasonic propagation time in the material.
Although there are many differences in the selection of measuring points and standard materials in the calibration of several thickness gauges, there are some common points to be noted in the operation. For example, each thickness gauge has a lower limit on the surface curvature and minimum thickness of the substrate, and the substrate with reasonable size should be selected for operation in the actual calibration; The orientation and pressure of the probe will also affect the measurement results. It is necessary to keep the probe perpendicular to the substrate and keep the pressure constant and as small as possible; In addition, attention should be paid to the interference of external magnetic field and matrix remanence when the coating thickness gauge is calibrated, and the influence of temperature change and coupling agent viscosity when the ultrasonic thickness gauge is calibrated.
If you need any kinds of digital torque gauge, please contact us, as a professional measuring instruments manufacturing company, mikrometry is willing to offer you high quality products.
- このできごとのURL:


コメント